


As of April 8, 2015, this is what Lulu.com’s Create A Book Page looks like. It’s very helpful in setting up your book before you piece it together and send it to them. You can view the page at http://www.lulu.com/create/books. I think this will be more useful because the Lulu.com forums and help pages tend to be out-of-date and there is a lot of inconsistent advice.
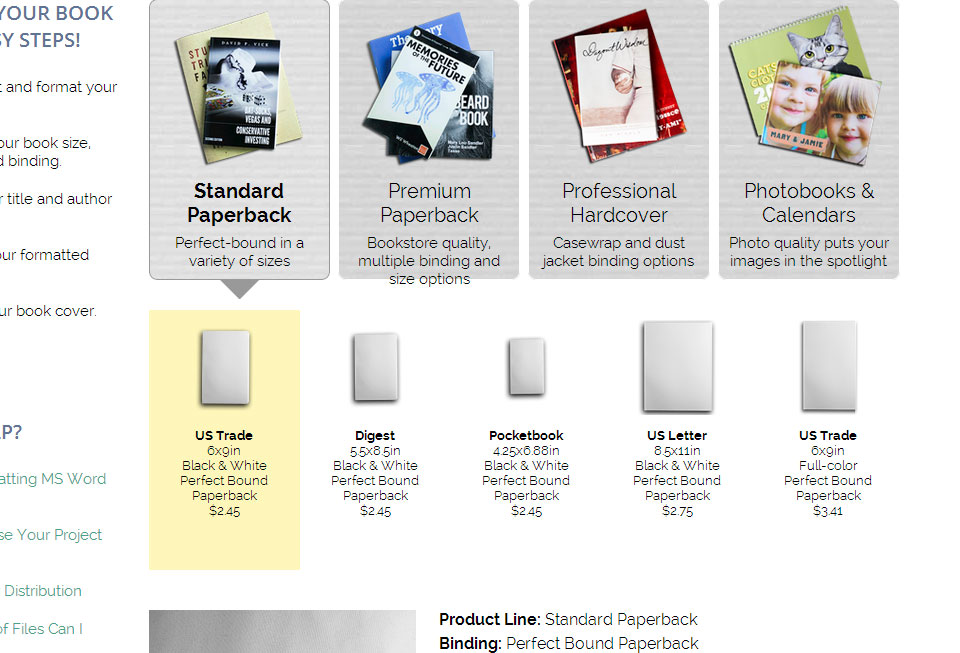
First decide which quality line of production you want for your book. The most recent choices are:
- Standard Paperback – Formerly known as the “value” line, but the quality is still very good. You would choose this line if your budget is tight and looking to distribute manually or in to distribute to smaller audience.
- Premium Paperback – You would choose this line if you have a slightly bigger budget and would like Lulu to help you distribute your book via online venues such as Amazon.com, Barnes and Nobles.com, etc, via their Global Reach program. Mind you, there are strict criteria to qualify for this program, so any books that are setup for Standard Paperback will not qualify.
- Professional Hardcover – Same as Premium but in hardcover
- Photobooks/Calendars – Ultra high resolution printing
But regarding comic books, most likely you’re going to choose Standard Paperback or Premium Paperback.
In Standard Paperback, you will get the most traditional comic book settings.
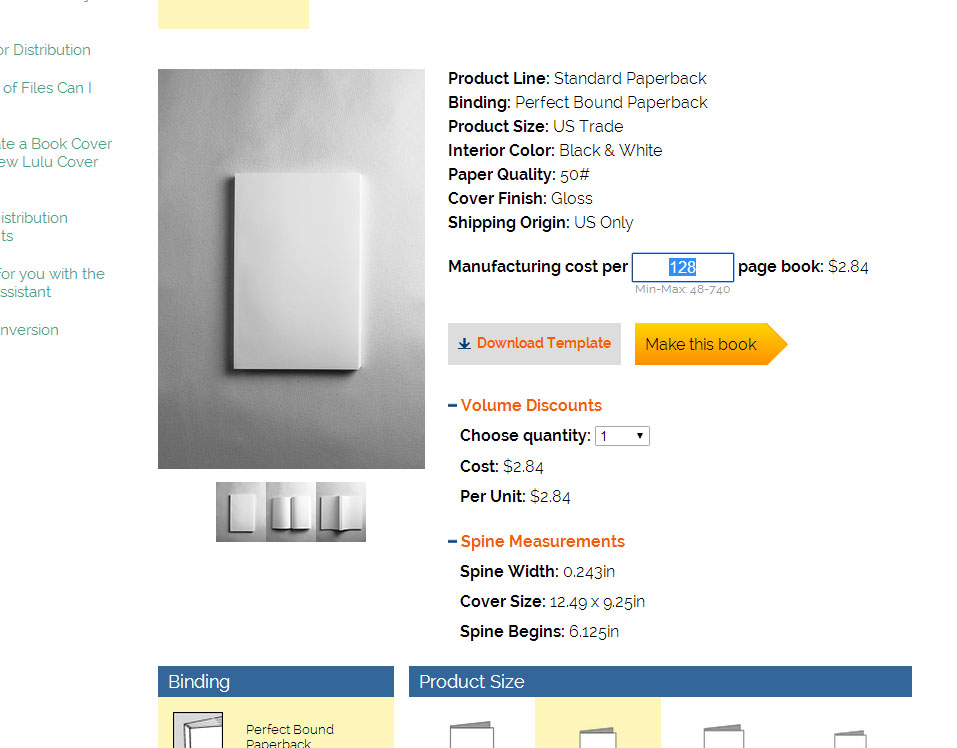
Next, type in the page count you intend to create. This is an important part of the layout process because you can determine the exact size of the cover if you want a wraparound. Otherwise, you can use Lulu’s pre-made template, but that doesn’t let you design the spine of your book. Note, though, that there is a minimum requirement to design your spine, and that’s usually by setting a minimum number of pages. Just pay attention to what the book generator tells you.
Pay close attention to the cover size. This is the EXACT size that your book’s cover needs to be (after cropping off the margins). Of course, the size doesn’t include any bleed margins, you you will have to add that yourself, which is 0.125 inches on every side. In most cases, the printer will center it anyway and crop it off evenly on all sides. But to be safe, make sure everything you want visible is kept within the safety margins.
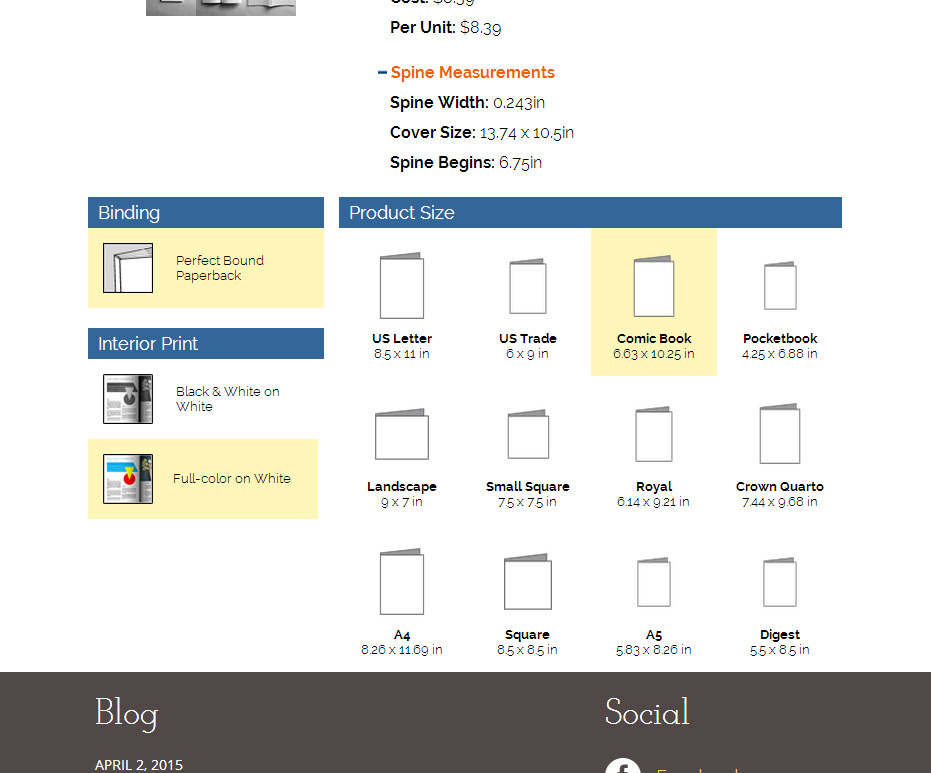
Next, you want to select the book size and color settings. If your budget is tight, you might have to use the default black and white setting. If you choose color setting, it will require some delicate color adjustments to your artwork in order for it to come out properly. This shouldn’t be a problem in Premium Line as the color is printed at full resolution on premium paper, but it costs more. So I’ll go into setting up a color comic book in the Standard Line in another tutorial.
And that’s it for layout settings. I’m assuming you don’t already have the book content ready to go. If so, then you can hit that yellow “Make This Book” button and login to your Lulu.com account and submit it.
Otherwise, I’ll show you how to prepare your layout to begin your actual book production.
If you aren’t using a layout program like Quark Express or Adobe InDesign, this is how you would prepare your layout:
1. Download the template corresponding to the book size you desire
2. Note that it comes in variety of formats. If you can open the PNG files in an image editor, free ones like GIMP or Paint.Net, make a copy or Save As the Image and work on that new copy. You would do this for every page in your book and save it as a separate image.
3. If you’re using Word or another text editor, you would go into Page Setup and change the page size to the same size as your book size. Make sure the margins match the safety margins in the template.
Remember, the saftey total margins are: 0.5 inches which means on each side of every interior page, would have a 0.25 inch margin on each side.
And the bleed/trim total margins are : 0.25 inches which means on the side of every interior page, would have 0.125 inches on each side.
Note, on the cover templates, that these margins are different because of where the spine will be bound. But if you use the book generator’s one-piece wrap-around cover tool, you can treat it as a single page with all the margins accounted for. It’s quite helpful.
Always work at resolutions of at least 300 dpi. You can go up to 1200 dpi, and I have confirmed this, but it’s just not practical, not only for you because your computer won’t have the capacity to process or store it, but Lulu.com’s computers and printers won’t either. Even 600 dpi images will add up. So 300 dpi is more than plenty. You’ll thank me later when you can fit all 128 pages of your comic into one PDF rather than just a quarter of the page count. The print quality will be the same. Trust me.